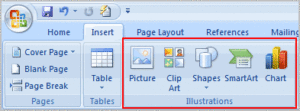
One picture is worth more than 1000 words – it is always useful in understanding some text matter, when there are some pictorial examples or graphical representations are added to that. The illustration group of insert tab is useful to add such type of illustrations to our word document. We will what is their significance and how to add them to our document and modify them as per our need.

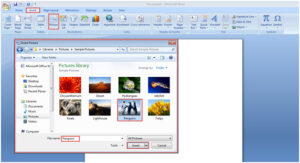
Insert Picture dialog box appears with the following options

Select location of the picture file, name and click on insert.
Your selected picture will appear at the cursor position in your document.
Editing Pictures
Once a picture is inserted, you can see corner handles at the corners of your picture and rotate handle at the top middle. You can use them to resize and rotate your picture as per your need.
Format contextual tab will be added to your existing tabs, when you select the picture. It will provide various options to modify the picture.
![]()
Inserting Cliparts
- Insert tab–>illustrations groupàClip art button
- In Clip art taskpane, type a word or category name, press Go
- Select the Location of clipart in Search in drop down list
- Select type of clipart to be viewed in Results should be list box
- From the list of cliparts displaying
- Double click a clipart (or)
- Click on right side arrow of a clipart–>Insert
- Drag the clipart onto document
Insert Pictures:
- Insert tab–>illustrations group–>picture button
- Select a picture from respective location
Editing Pictures/Cliparts:
- Click on picture/clipart to activate picture toolbar and resize handles
- Use resize handles to resize the picture/clipart
- Click on color button to change color
- Use contrast and brightness buttons to change contrast/brightness
- Crop button terminates unwanted portion of image
- Rotate button rotates the picture in anti-clock wise 900
- Text wrapping button determines adjustment of picture/clipart with surrounding text
- Format picture button opens dialog box with options
- Use rotate handle to rotate picture
- Right click–>ungroupàchange/remove contents(for some cliparts only)
- Right click–>Order–>Select a display order for the item
(or)
- Right click on picture/clipart
- Select format picture
- Page Tabs of Format Picture Dialog box:
- Colors and Lines
- Size
- Layout
- Picture
- Reset button cancels all changes you made
Inserting Autoshapes
- Insert tab–>illustrations group–>shapes button
- Select shape
- In Drawing Canvas draw the shape
- Click and crop drawing canvas (or) drag the shape outside canvas and delete canvas
Inserting WordArt
- Insert tab–>text group–>WordArt button
- Select a Word Art Style
- Type your Text
- Click on your text to activate word art toolbar
- Use Edit text button to modify the text
- Word Gallery button allows to change the style of Wordart
- Word Art Shape provides various shapes for the word art
- Format word art provides options to change visual properties of word art
Inserting Symbols/Equations:
Insert tab–>Symbols group–>symbol/Equation button
Insert Page Numbers
- Insert tab–>Header & footer group–>Page Number
- Select the position of page number on the page in Position list box
- Select an alignment for page number in Alignment list box
- You can determine whether you want the page number in the first page or not by Show number on first page
- Click on Format button to select style for the page number
Insert Breaks
Insert tab–>pages group–>page breaks button (for page break)
(or)
- Insert tab–>page setup group–>breaks button
- Page break stops current page and starts next page
- Column break starts next column
- Text wrapping break starts next paragraph
- Section break starts new section
- Options for Section break:
- Nextpage: starts next section in next page
- Continuous: starts next section in same page
- Even page: starts next section in next even numbered page
- Odd Page: starts next section in next odd numbered page
