Word is a word-processing software comes with Microsoft Office Package. From Word 2007 version Microsoft removed the Menu and Toolbars with Tabs and Groups. Default filename of Word version 2007 is document and extension is .docx.
New Features of Word 2007:
Office Button
Tabs, Ribbon and Groups in the place of menus and toolbars
Quick Access Toolbar
Office button and Quick access toolbars contain basic commands necessary for file operations.
Customizing Quick Access Toolbar:
Right click on empty space of tabs–>customize quick access toolbar
(or)
Click on down showing arrow at right side of Quick access toolbar
Ribbon contains groups of different icons for the tab selected.
Show/hide Ribbon:
Right click on ribbon–>Minimize ribbon to hide
Click on empty area of tabs–>minimize ribbon to show
Some Groups contain arrow at lower right corner that opens a dialog box
Moving between Tabs using Keyboard:
Press Alt to activate Tabs with Hot keys
Press the hot key to open the tab with hot keys for groups and commands (or) use arrows to change between tabs
Press Esc to deactivate Hot keys
Creating new File:
Office button–>New (or) alt+f+n
Select blank document–>OK
Opening an existing document:
Office button–>open
Select a folder–>Select word file–>Open
Saving document:
Office button–>Save/Save As
Select location of folder
Type a file name
Saving Document in other format:
Office button–>Save As
Select the format in File Type list box
Type the file name if you want
Select the location of folder if you want
Show/hide ruler:
view Tab–>show/hide group–>ruler checkbox
Setting up size and margins of page to be printed:
Page layout Tab–>Use buttons in Page Setup group
(or)
Click on right arrow on lower right corner of Page Setup group of Page Layout tab to open Page Setup dialog box
Printing and previewing a document:
Office button–>print
Viewing document using different views:
view tab–>document views group
Changing Magnification Level of page:
View Tab–>Zoom Group
(or)
Drag the Zoom slider at lower right corner of Word 2007 window.
(or)
Ctrl+scroll the mouse
=rand() functions inserts sample text to test and work on the features of Ms-Word. The rand() functions with no arguments inserts 3 paragraphs of 5 sentences each. You can also specify number of paragraphs and sentences to be inserted with rand function
=rand(paragraphs,sentences)
Moving Cursor with Keyboard:
Text Selection methods with Mouse:
Text Selection methods with keyboard:
KBS for Formatting Styles:
Bold: Ctrl+B
Italic: Ctrl+I
Underline: Ctrl+U
Superscript: Ctrl+shift++
subscript: ctrl+=
To change font size by one point:
Increase: Ctrl+]
Decrease: Ctrl+[
To change font size by standard point:
Increase: Ctrl+shift+>
Decrease: Ctrl+shift+<
Changing from smaller case to upper:
Home Tab–>Paragraph Group
KBS for Alignment:
Left: Ctrl+L
Right: Ctrl+R
Center: Ctrl+E
Justity: Ctrl+J
Line Spacing:
Single: Ctrl+1
1.5 points: Ctrl+5
Double: Ctrl+2
Indentation:
Increase indent: Ctrl+M
Decrease indent: Shift+Ctrl+M
Bullets and Numbering format can be used to create list style of information.
Bullets can used to create unordered list whereas Numbers can be used to create ordered list.
Applying Bullets and Numbering:
Changing Background of document:
Applying Borders and Shading:
Page Layout Tab–>Page background Group
Inserting Tables
Draw Table:
Enter, select and format data in Table:
Resize columns/rows:
Drag column or row within table or on the ruler
Insert/Delete Rows/Columns/Cells:
Merging cells into single cell:
Dividing cells into columns or rows:
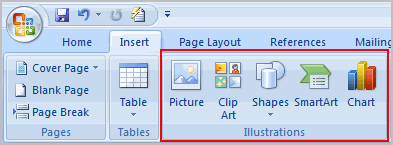
One picture is worth more than 1000 words – it is always useful in understanding some text matter, when there are some pictorial examples or graphical representations are added to that. The illustration group of insert tab is useful to add such type of illustrations to our word document. We will what is their significance and how to add them to our document and modify them as per our need.

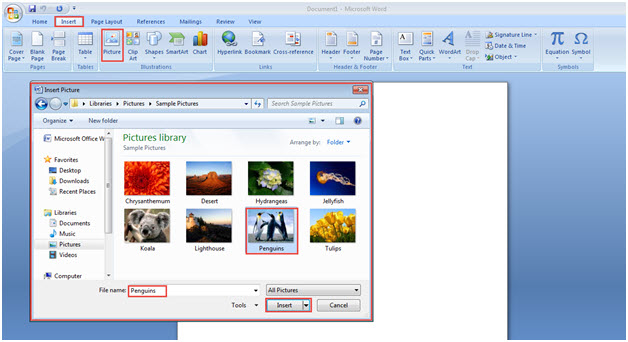
Insert Picture dialog box appears with the following options

Select location of the picture file, name and click on insert.
Your selected picture will appear at the cursor position in your document.
Editing Pictures
Once a picture is inserted, you can see corner handles at the corners of your picture and rotate handle at the top middle. You can use them to resize and rotate your picture as per your need.
Format contextual tab will be added to your existing tabs, when you select the picture. It will provide various options to modify the picture.

Inserting Cliparts
Insert Pictures:
Editing Pictures/Cliparts:
(or)
Inserting Autoshapes
Inserting WordArt
Inserting Symbols/Equations:
Insert tab–>Symbols group–>symbol/Equation button
Insert Page Numbers
Insert Breaks
Insert tab–>pages group–>page breaks button (for page break)
(or)
You cannot copy content of this page
WhatsApp us to know more about your Course
